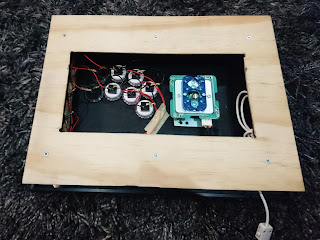
Much has happened since last we spoke! My new hardware order from Arcade Shock took a little longer than anticipated, but work was swiftly resumed on the other side!
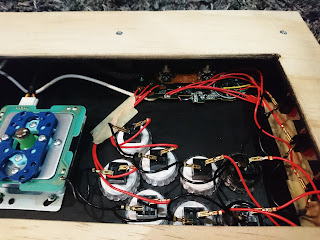
The mid section of the case was blown over with some black spray paint, to blend it in with the frame, along with one side of the lower plate, which i decided to cut a hole in (roughly!) to help accessibility. Then the hardware was installed.
My cheap ebay Classic Controller Pro PCB is mounted as per the Seimitsu LS-32 joystick, with small countersunk bolts screwed in from the top-side. You can find more about the wiring setup in Part 3 of my Lucario stick build.
Once the guts were installed, the art layers go on, before the Stromby frames attach using the supplied spring-steel clips. I use two of the triangular "corner" clips at the end with the buttons per frame, and two of the "c-shaped" clips per frame at the wiimote end. This creates a rock solid feeling stick with double-sided art!
The springy frame clips are also used to retain the Wiimote, which is just pressed into the side of the case to install. Removal is as easy as getting a finger behind it and pulling it out!
At this stage i still need to install the upper clear sheet and both art layers, but functionally and aesthetically this is my favourite stick yet! It's rock solid, the touch-points feel great, and it's a breeze to use. If you want a great arcade stick on the cheap it's very, very hard to beat this!
Stay tuned for the finale.


This comment has been removed by the author.
ReplyDelete